- Verification Flow Action で、Verification という名前のセクションを作成し、Design タブを開きます。
- 動的レイアウトを 2 つ追加します。1 つ目の動的レイアウトには、VerificationSection という名前の埋め込みセクションを追加します。2 つ目には、Submit という名前のボタンを追加します。
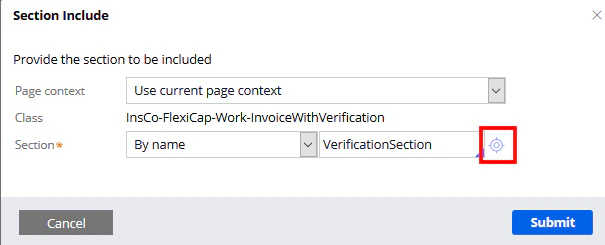
VerificationSection
動的レイアウトに埋め込みセクションを追加する場合:- Page context リストで Use current page context を選択します。Section フィールドで By name を選択し、次の値を指定します: VerificationSection。
-
設定ボタンをクリックして、新しいセクションを作成します。
- Create and open をクリックし、次に HTML タブをクリックします。
- Auto-generated HTML オプションをオフにして、以下のコードを入力します。
このコードは VerificationSection.html ファイルからコピーすることもできます。このファイルは %Installation Path%\Connector for FlexiCapture as a Service with verification\Samples\Code examples\Flow actions にあります。
カスタムの Submit ボタンを作成する
動的レイアウトにボタンを作成する前に、ボタンを画面の右側に寄せる必要があります。そのためには、動的レイアウトのプロパティを開き、Presentation タブをクリックして、Float field で Right を選択します。変更を適用するには、Submit をクリックします。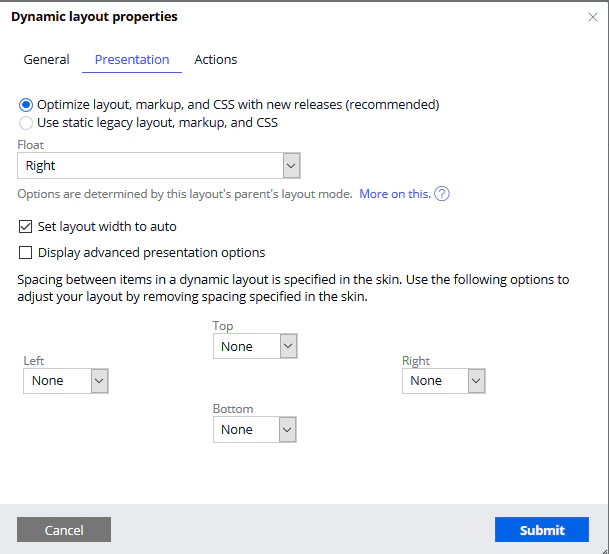
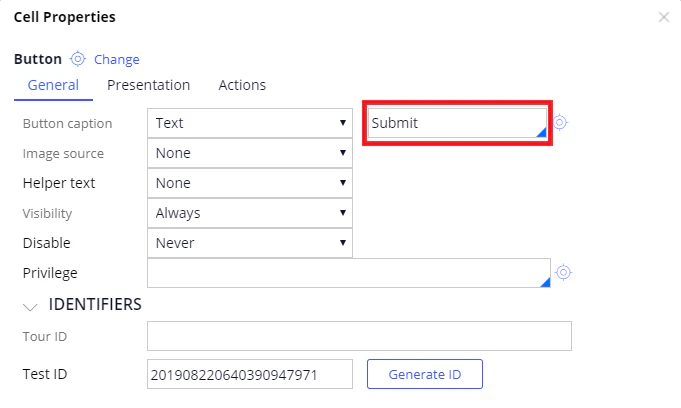
- 基本の Button 要素を動的レイアウトに追加し、そのプロパティを開きます。
-
General タブをクリックし、ボタンのキャプションテキストに Submit を指定します。
-
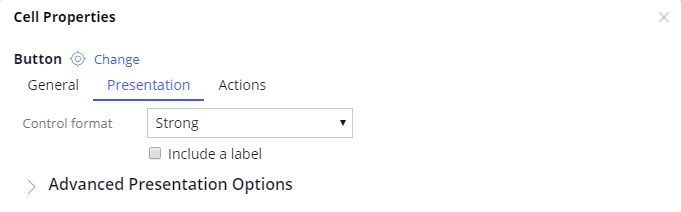
Presentation タブで、Control format リストから Strong を選択します。
-
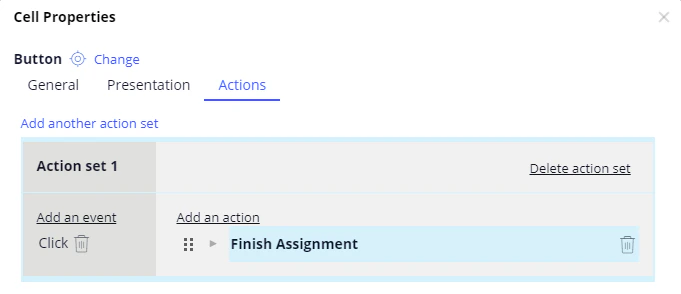
Action タブで、Click イベントを追加し、Finish Assignment アクションに接続します。
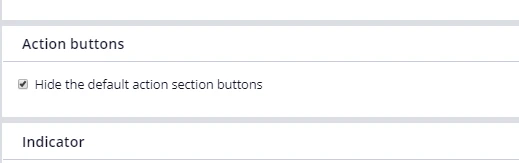
- Submit をクリックします。flow の標準ボタンセット (Cancel、Save、Submit) を非表示にするには、Records → Process → Flow Action をクリックして Verification を開き、Action タブをクリックして、Hide the default action section buttons を選択します。