
Prerequisites
- The ABBYY FlexiCapture 12 Project Setup Station is installed.
- The ABBYY FlexiCapture 12 Application Server administrator’s account is configured.
Upload the sample project to the Application Server
The distribution package includes a sample ABBYY FlexiCapture project that demonstrates how the connector extracts data from invoices.1
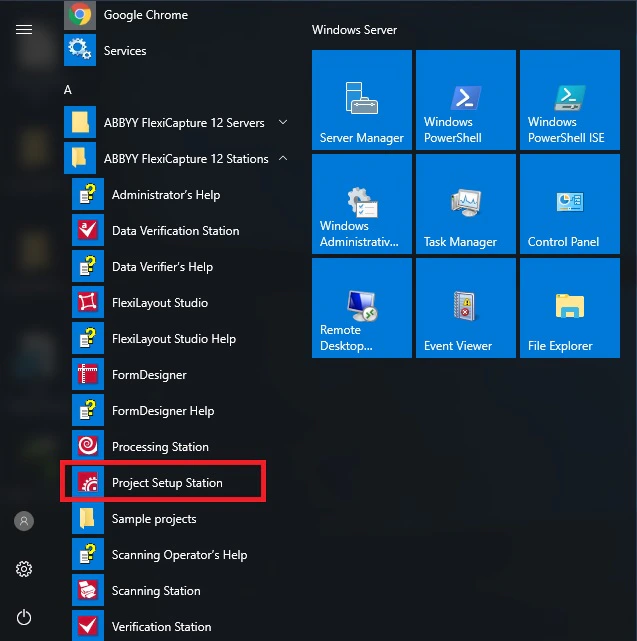
Open the Project Setup Station
2
Open the sample project
Click File → Open Project, browse to 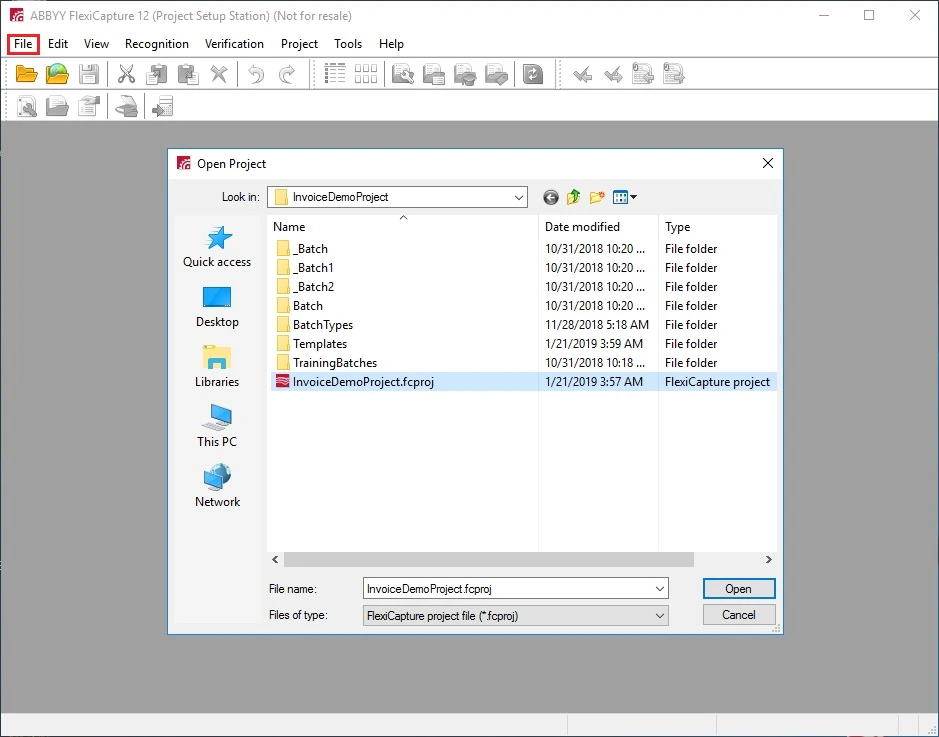
ABBYY FlexiCapture Connector for Automation Anywhere\Samples\FlexiCapture Projects\InvoiceDemoProject, and select InvoiceDemoProject.fcproj.3
Start the upload
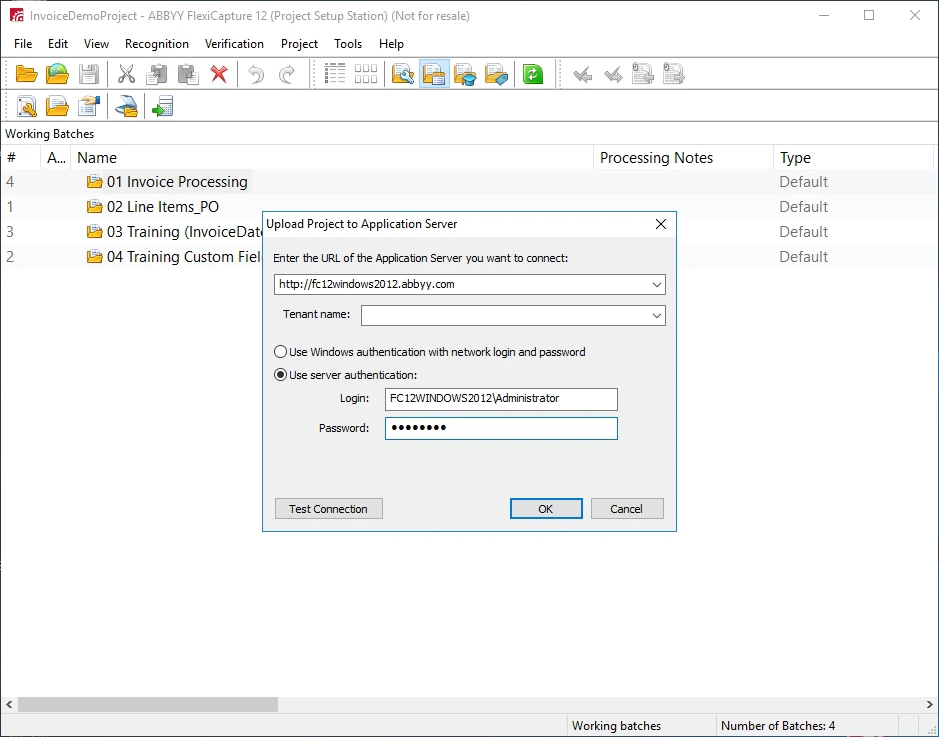
Click File → Upload Project to Server.
4
Specify the server and credentials
In the dialog box that opens, specify the address of the ABBYY FlexiCapture server and the ABBYY FlexiCapture administrator credentials. If you are using a tenant, specify the name of the tenant in the corresponding field.
5
Confirm the upload
Click OK.
Configure the unattended service scenario
1
Open the project from the server
- Open the Project Setup Station.
- Click File → Open Project from Server.
- In the Open Existing Project from Application Server dialog box, specify the address of the ABBYY FlexiCapture server and the administrator credentials. If you are using a tenant, specify the name of the tenant in the corresponding field.
2
Select the project
In the dialog box that opens, select the project.
3
Select the Unattended schema
Click Project → Project Properties and click the Workflow tab. From the Schema drop-down list, select Unattended.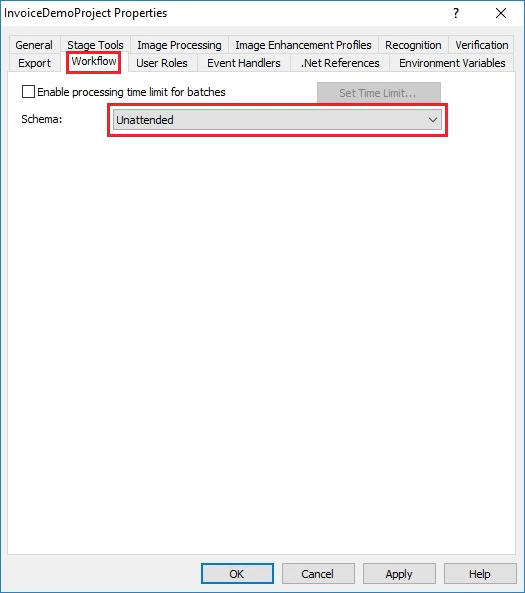
4
Save the settings
Click OK.
Configure the attended service scenario
1
Open the project from the server
- Open the Project Setup Station.
- Click File → Open Project from Server.
- In the Open Existing Project from Application Server dialog box, specify the address of the ABBYY FlexiCapture server and the administrator credentials. If you are using a tenant, specify the name of the tenant in the corresponding field.
2
Select the project
In the dialog box that opens, select the project.
3
Select the Advanced schema
Click Project → Project Properties and click the Workflow tab. From the Schema drop-down list, select Advanced.
4
Edit the Verification stage
Select the Verification option, and then click Edit.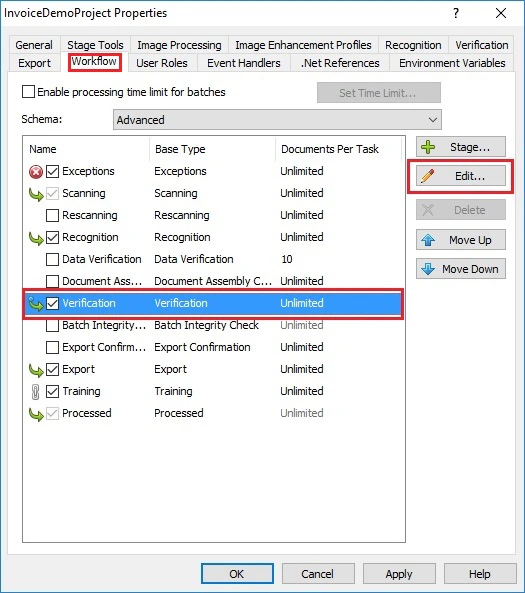
5
Enable the web stations
In the dialog box that opens, click the General tab and select the Enable web stations option.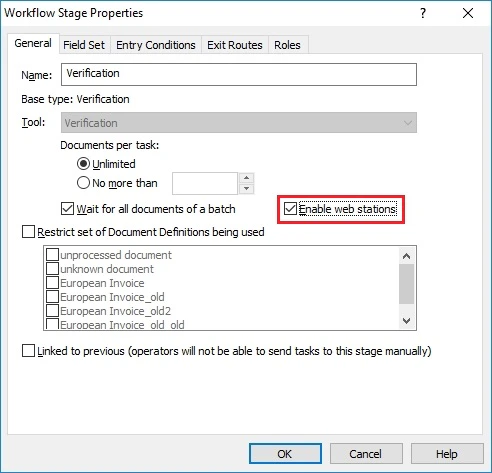
6
Save the settings
Click OK, and then click OK again to close the Project Properties dialog box.