
- For individual batches – The options are selected on the Scanning tab of the Options dialog box.
- For a certain batch type – The scanner source is selected when creating the batch type with the Batch Type Wizard and can be adjusted on the Scanning tab of the Batch Type Properties dialog box.
Select a scanner source
1
Select a scanner
Choose a scanner source in one of the following ways:
- Select one of the available scanners.
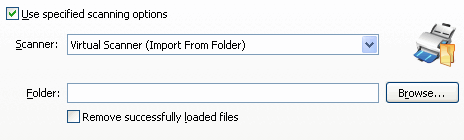
- Select a virtual scanner to import images from a folder.
2
Configure the selected source
Configure the settings for the selected scanner source.For a hardware scanner: Select the interface to use for scanning: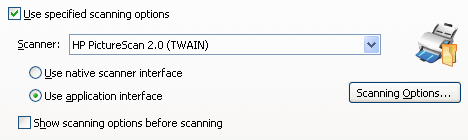
- Scanner’s interface – Opens the dialog box provided by your scanner’s driver.
- Application’s interface – Opens the Scanner Settings dialog box.
- Specify the path to the folder from which images are to be imported. Click Browse… to locate the folder.
- To delete the images from their source folder after they are imported, select the Remove successfully loaded files box.
3
Reuse these scanning options
Select Use these scanning options to control what happens when you scan pages:
- Selected – Scanning launches automatically when you click Scan Pages or choose the corresponding item from the File menu, and page images are scanned with the specified settings.
- Deselected – You are prompted to select a scanner and specify scanning settings each time you scan pages.