
1
Create the Separator element
Create an element of type Separator and name it hsTableHeaderTop.
2
Configure the separator
Click the Separator tab and set these values: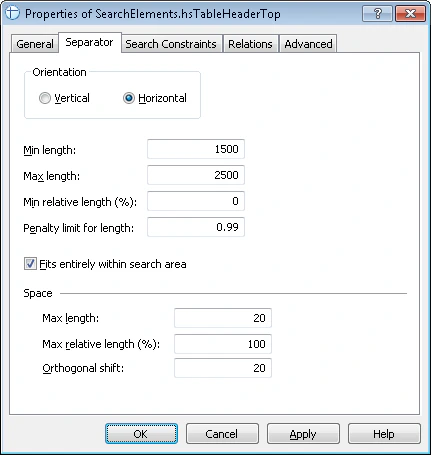
- In the Orientation group, select Horizontal.
- Set Min length / Max length to 1500 / 2500.
- Select Fits entirely within search area.
- Under Space, set Max length to 20 and Orthogonal shift to 20.
3
Set the search constraints
Click the Relations tab. The separator occurs only below the keywords of the kwInvoiceDate and kwInvoiceNumber names, so set these constraints:
- Below the
InvoiceHeader.kwInvoiceDateelement, Offset = 0 - Below the
InvoiceHeader.kwInvoiceNumberelement, Offset = 0
4
Add the search constraint
Click the Advanced tab. The separator sits at the top of the described search area, so set this additional search constraint in the Advanced pre-search relations field: look for the object on the image nearest to its top boundary. In the FlexiLayout language:
5
Verify the match
Match the FlexiLayout with the test images and confirm that FlexiLayout Studio detects the element on every image.