
Add the assembly to the Workflow Administration Console
1
Open the Workflow Administration Console
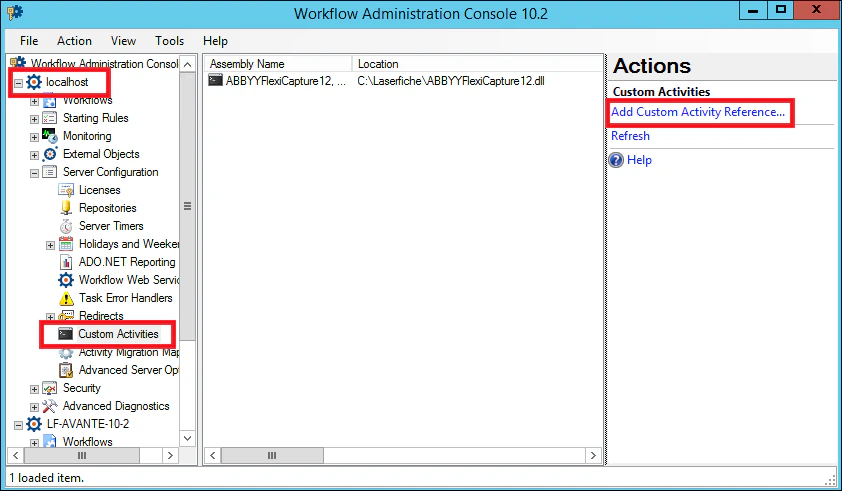
Expand the Server Configuration node of the Workflow server where you want to add the activity.
2
Select Custom Activities
3
Add the assembly
Click Add Custom Activity Reference and add the
ABBYYFlexiCapture12.dll assembly.If file browsing is disabled
Clicking Add Custom Activity Reference can produce the errorThe Workflow Server does not have file browsing enabled. [0620-WF1].
1
Open the Security node
In the Workflow Administration Console, expand the Security node.
2
Open the file browser options
Select File Browser Options, and then click Edit Options.
3
Enable file browsing
On the General tab, select Enable file browsing.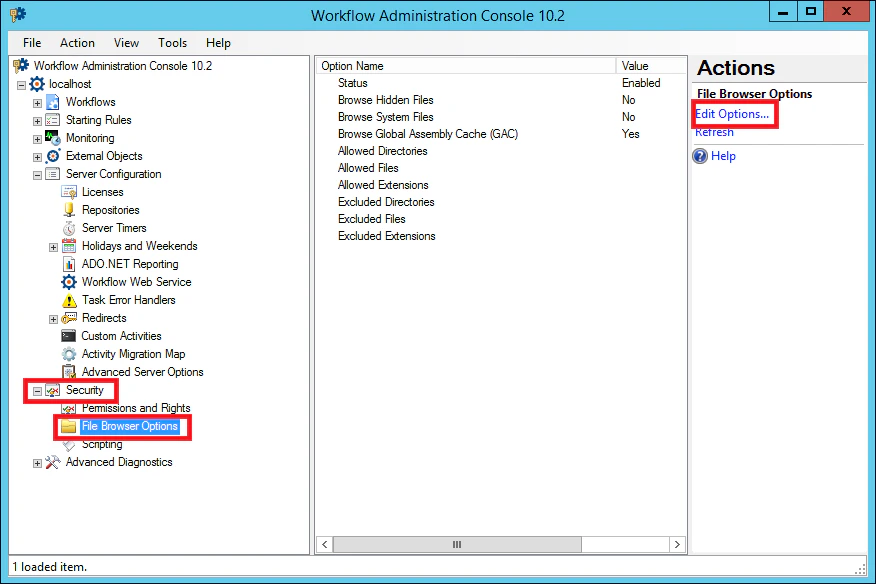
Add the assembly to Workflow Designer
1
Open the Toolbox menu
Open Workflow Designer, right-click the Toolbox pane, and then select Add/Remove Activities.
2
Add the assembly
In the Add/Remove Toolbox Activities dialog box, click Add and add the 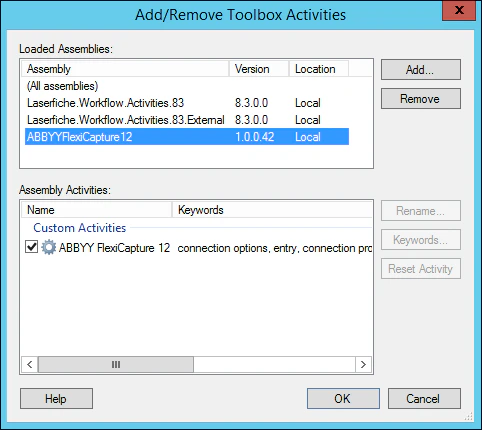
ABBYYFlexiCapture12.dll assembly.The assembly becomes available in the Toolbox pane under Custom Activities.