To install the PEGA, you need to: Import a connector to the Pega server Create a library Create required functions

Importing a connector to the Pega server

To import the connector to the server:
  1. Open Dev Studio and click Configure → Application → Distribution → Import.
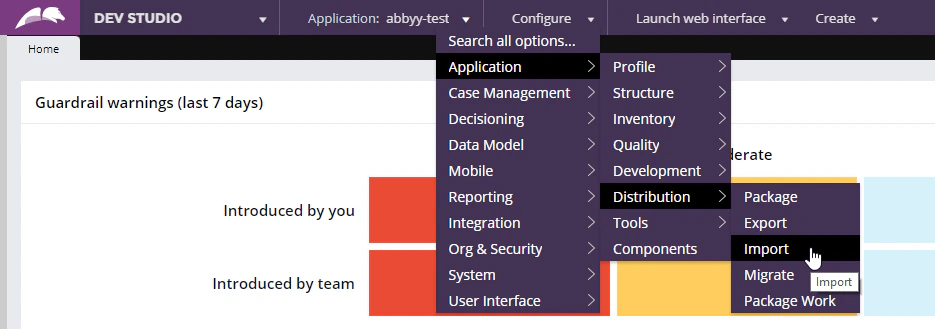
    Screenshot of Pega Dev Studio with the Configure menu open, showing the Application → Distribution → Import path being selected to import the connector.
  2. Load the abbyy.flexicapture.webapi.client.jar file on to the server.
  3. Open the Pega Self-Service Portal and click Restart Server.
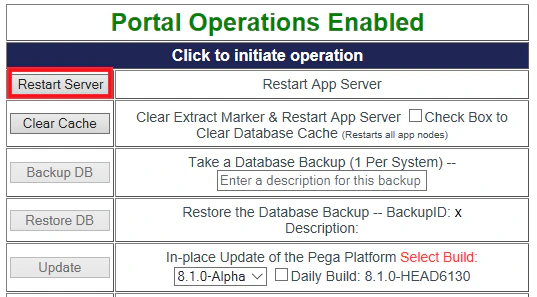
Screenshot of the Pega Self-Service Portal Operations page with the Restart Server button highlighted to restart the application server.

Creating a library

To create a library:
  1. Click Records → Technical → Library → Create.
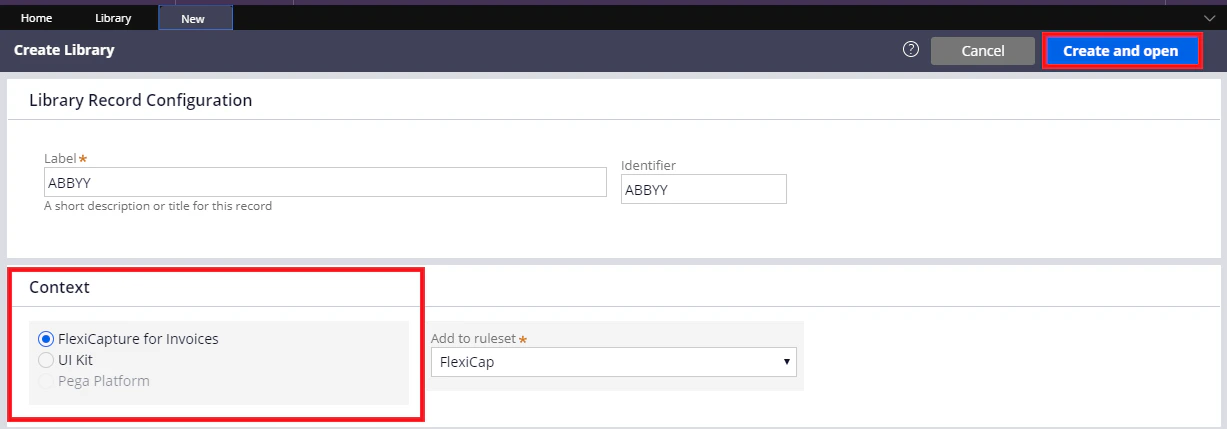
  2. In the Label field of the Create Library tab, specify a name for the library (e.g. ABBYY) and fill in the Identifier field. Make sure that the library is being created within the context of your application and then click Create and open.
    Screenshot of the Pega Create Library form with ABBYY entered in the Label and Identifier fields and FlexiCapture for Invoices selected as the application context.
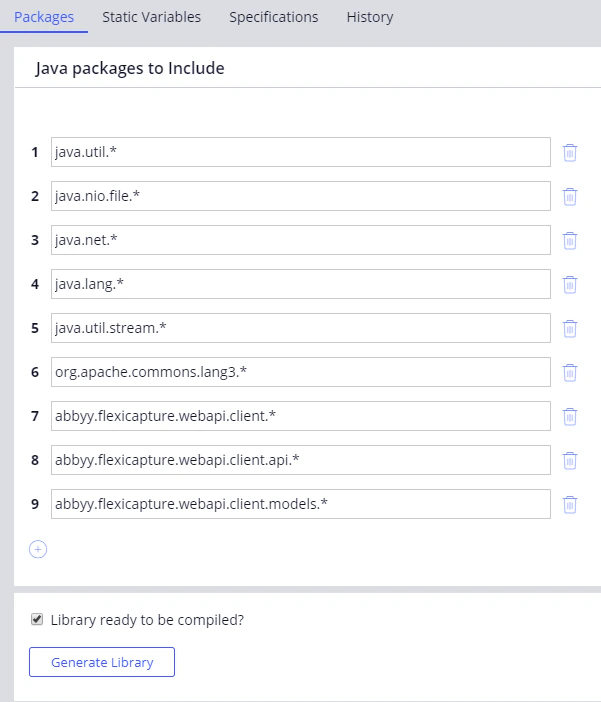
  3. On the Packages tab, add the following packages:
    • java.util.*
    • java.nio.file.*
    • java.net.*
    • java.lang.*
    • java.util.stream.*
    • org.apache.commons.lang3.*
    • abbyy.flexicapture.webapi.client.*
    • abbyy.flexicapture.webapi.client.api.*
    • abbyy.flexicapture.webapi.client.models.*
    Screenshot of Pega Dev Studio on the library Packages tab, listing the nine Java packages to include, including the abbyy.flexicapture.webapi.client packages, with the Generate Library button below.
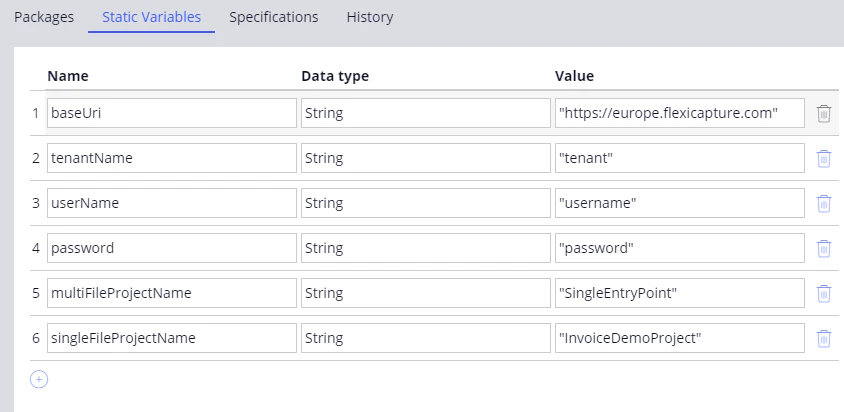
  4. On the Static Variables tab, create the following string variables:
    • baseUri
    • tenantName
    • userName
    • Password
    • multiFileProjectName
    • singleFileProjectName
    Screenshot of Pega Dev Studio on the library Static Variables tab, showing the baseUri, tenantName, userName, password, multiFileProjectName, and singleFileProjectName String variables and their sample values.
  5. Click Save and then click Generate Library.

Creating a function

A function contains Java code that is executed when the function is called from other Pega objects. The input and output parameters of a function are specified on the Parameters tab, while exceptions are specified on the Imports & Exceptions tab. To create a function:
  1. Click Records → Technical → Function → Create and fill in the Label and Identifier fields.
  2. In the Library field, specify the name of the library you created earlier.
  3. In the Parameters section, specify the following two input parameters:
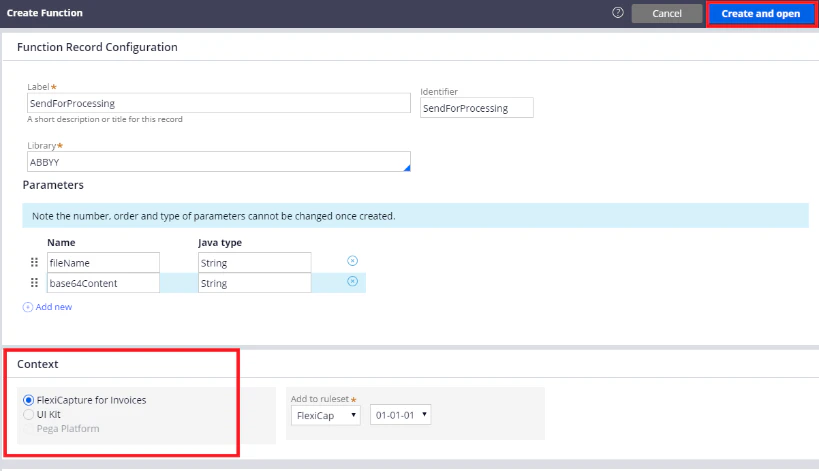
  1. Make sure that the function is being created within the context of your application and click Create and open.
    Screenshot of the Pega Create Function form with SendForProcessing in the Label field, the ABBYY library selected, the fileName and base64Content String parameters listed, and FlexiCapture for Invoices selected as the application context.
  2. In the window that opens, on the Parameters tab, specify int, string or boolean as the data type in the Java data type field:
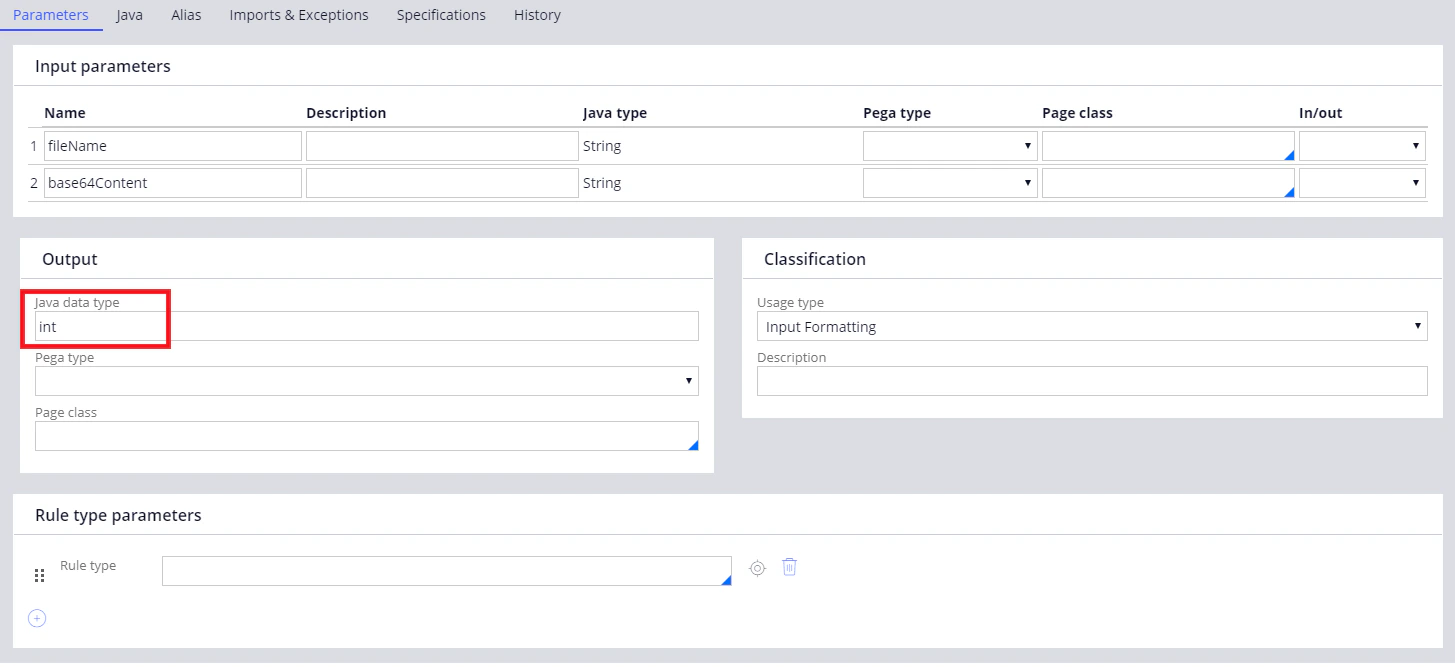
    Screenshot of Pega Dev Studio on the function Parameters tab, showing the fileName and base64Content String input parameters and int entered as the Java data type in the Output section.
  3. Click the Imports & Exceptions tab and type Exception in the Exceptions thrown section.
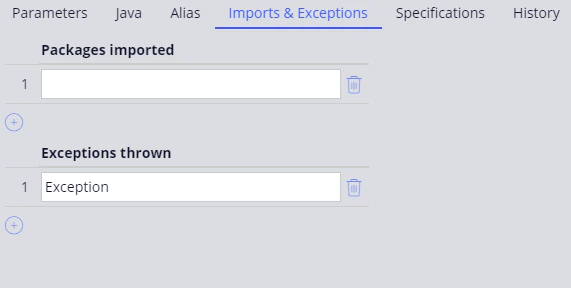
    Screenshot of Pega Dev Studio on the function Imports & Exceptions tab, showing Exception entered in the Exceptions thrown section.
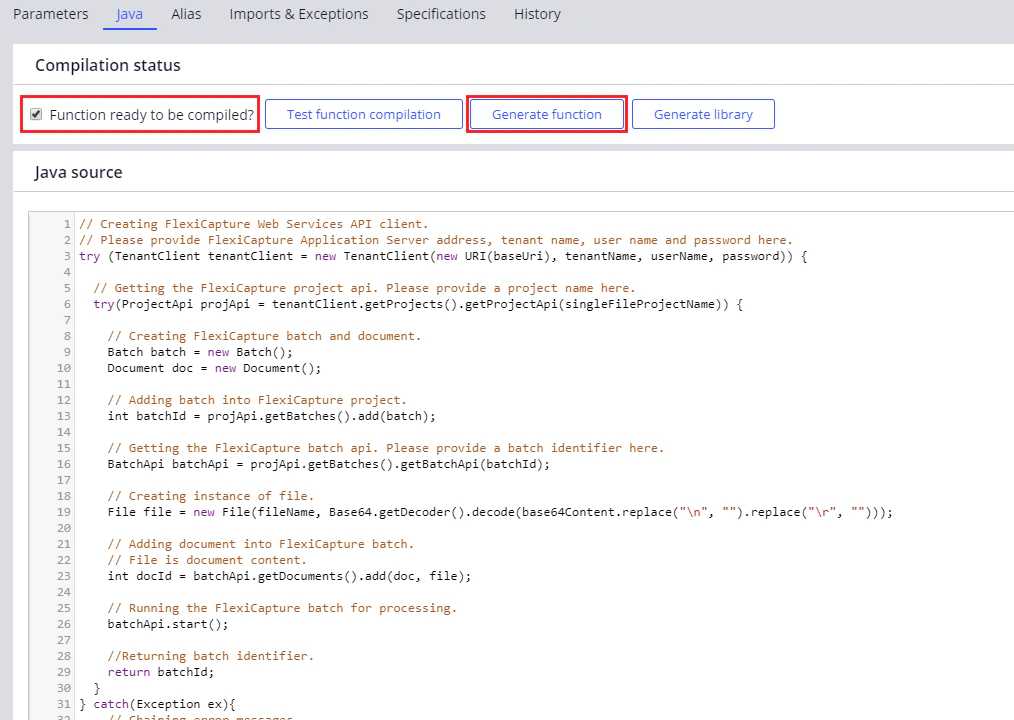
  4. Go back to the Java tab, insert the code for the function in the Java source field, select the Function ready to be compiled? option, save your changes, and click Generate function.
The code for the function can be copied from the java file, which you can find in %Installation Path%\Connector for FlexiCapture as a Service with verification\Samples\Code examples\Pega Functions.
Screenshot of Pega Dev Studio on the function Java tab, showing the Function ready to be compiled option selected, the Generate function button, and the Java source code that creates a FlexiCapture batch and returns its identifier.
To implement a single-document processing scenario, you need to:
  1. Create a set of functions to be used for the processing of a single document.
  2. Create general functions.
  3. Create a single-document processing case.
  4. Configure the user interface.
  5. Create a set of activities for your single-document processing case.
  6. Create a set of data transforms for your single-document processing case.
  7. Create a flow action.
  8. Create data types for your single-document processing case.
To implement a multi-document processing scenario, you need to:
  1. Create a set of functions to be used for the processing of multiple documents.
  2. Create general functions.
  3. Create a multi-document processing case.
  4. Create HTML fragments.
  5. Create a set of activities for your multi-document processing case.
  6. Create a set of data transforms for your multi-document processing case.
  7. Create a flow action.
  8. Create data types for your multi-document processing case.