
Register an application in Azure Active Directory
1
Open Enterprise applications in the Azure portal
Log in to the Microsoft Azure portal, and then go to Azure Active Directory > Enterprise applications.
2
Create a non-gallery application
In the Add an application window, go to the Non-gallery application section and specify a name for the new application. If several tenants are used, create a separate application for each.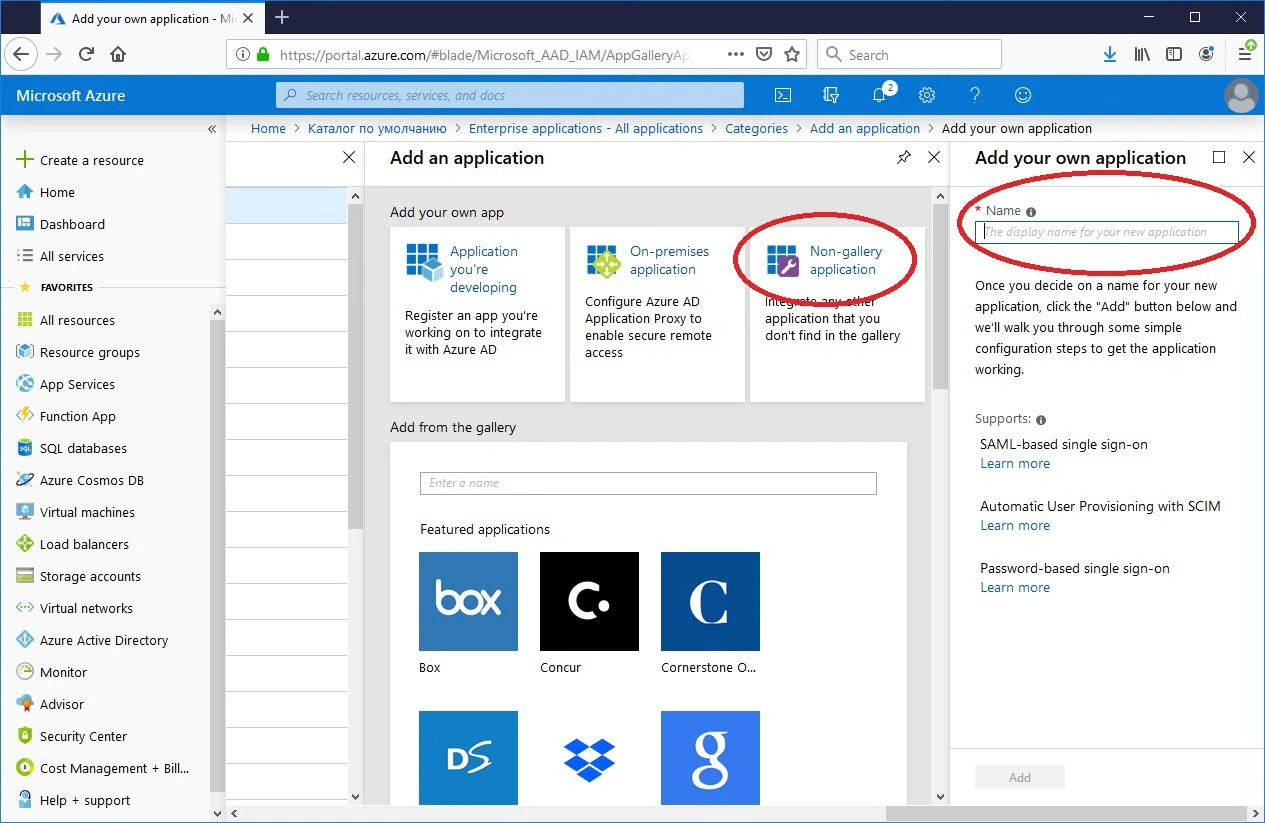
3
Add the users who need access
Go to the Users and groups section, add all required users, and give them the User role.
4
Select SAML as the sign-on method
Go to the Single sign-on subsection and select SAML.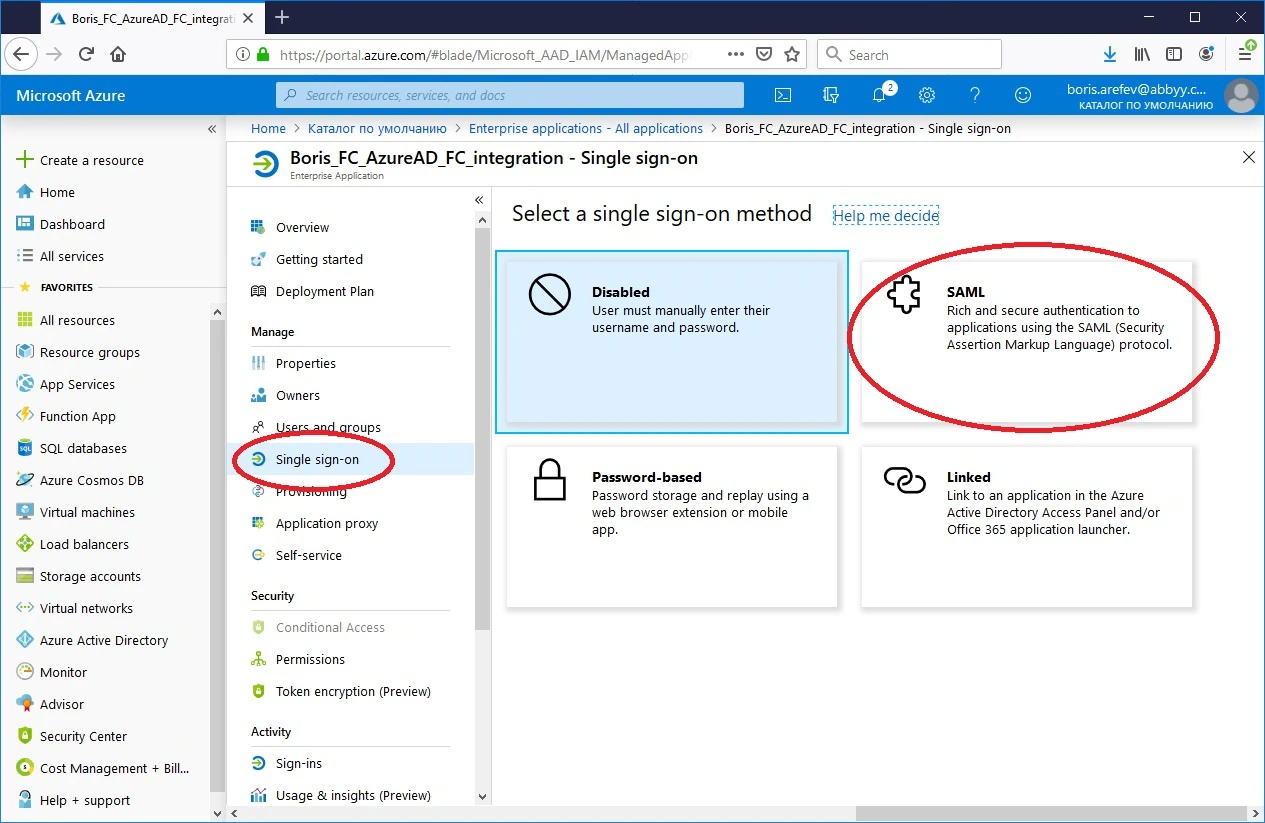
5
Set the identifier and the reply URL
Edit the Basic SAML Configuration section. In the Identifier (Entity ID) and Reply URL (Assertion Consumer Service URL) fields, enter 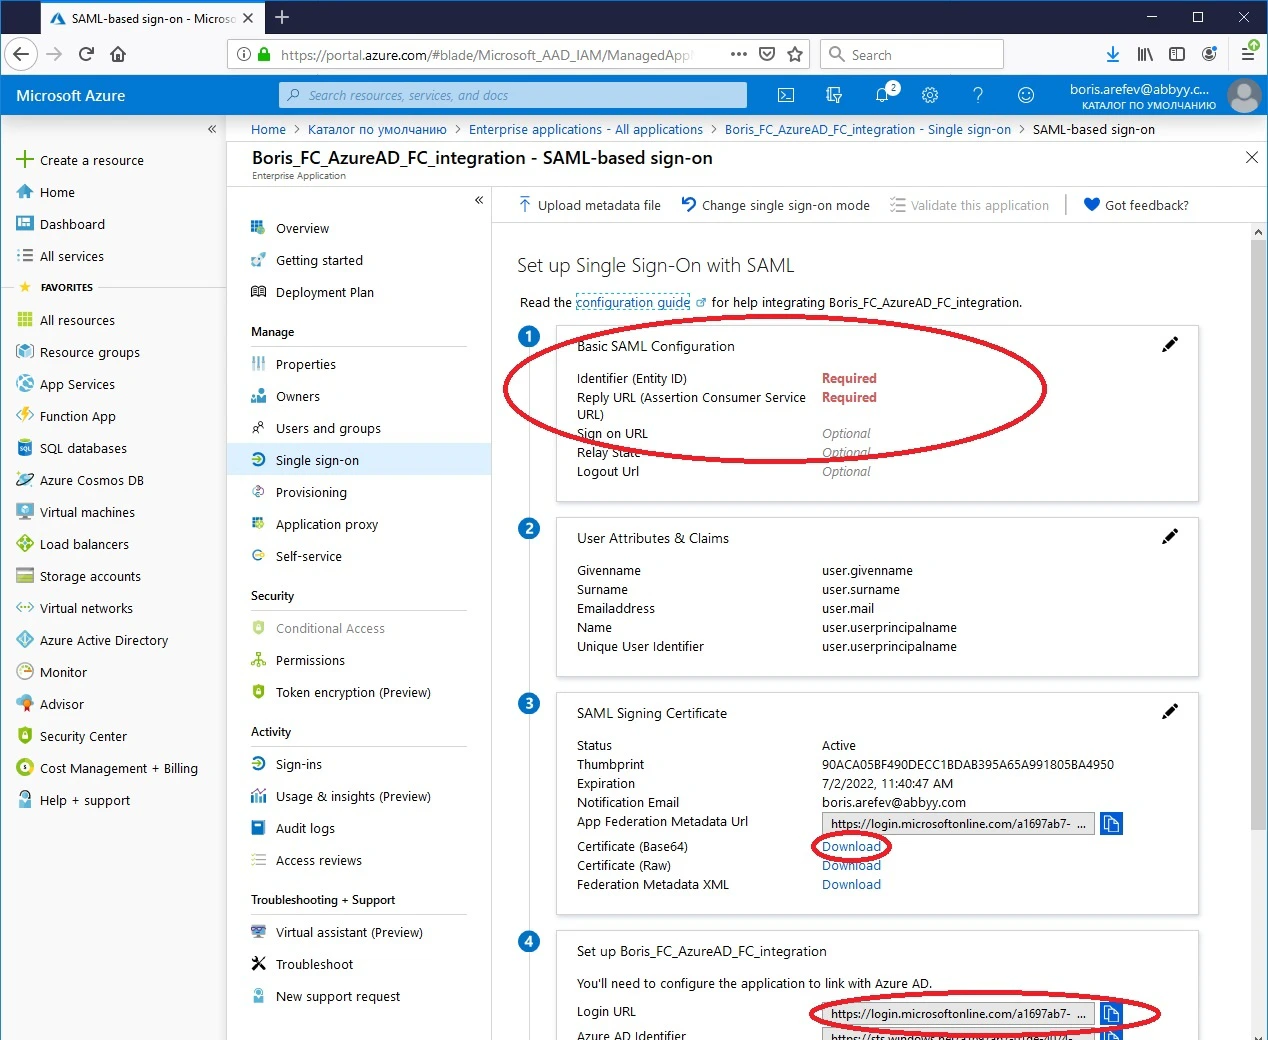
https://<app-server-dns-name>/FlexiCapture12/Login/AccessToken/Saml, and leave the rest of the fields blank.For a tenant, both fields take https://<app-server-dns-name>/FlexiCapture12/Login/<TenantName>/AccessToken/Saml instead.6
Download the public certificate
In the SAML Signing Certificate section, click the link next to Certificate (Base64) to download the certificate in Base64 format.
7
Copy the identity provider URL
From the Login URL field in the Set up [application name] section, copy the URL for accessing the server of the external identity provider.
Configure ABBYY FlexiCapture
Set the required parameters by running a PowerShell script.1
Obtain the script
Get the
SetIdentityProvider.ps1 script.2
Open the PowerShell console as an administrator
Do this on the machine where ABBYY FlexiCapture is installed.
3
Run the script with the required parameters
For example:The parameters are as follows.
/url– The path to the Application Server. Example:'https://localhost'./certFilePath– The path to the public certificate. Example:'C:\Temp\AzureAD_FC_integration.cer'./pictureFilePath– The path to the image used for the new button (.svg,.jpg, and.pngformats are supported). Example:'C:\Temp\index.svg'./tenant– The tenant for which the parameters are set. Example:'TenantName'. Specify this only if multiple tenants are used./providerName– The external identity provider. Example:'Azure AD'. The login button will then read Log in with Azure AD./Reference– The URL for accessing the external identity provider. Example:'https://login.microsoftonline.com/123e4567-e89b-12d3-a456-426655440000/saml2'.