
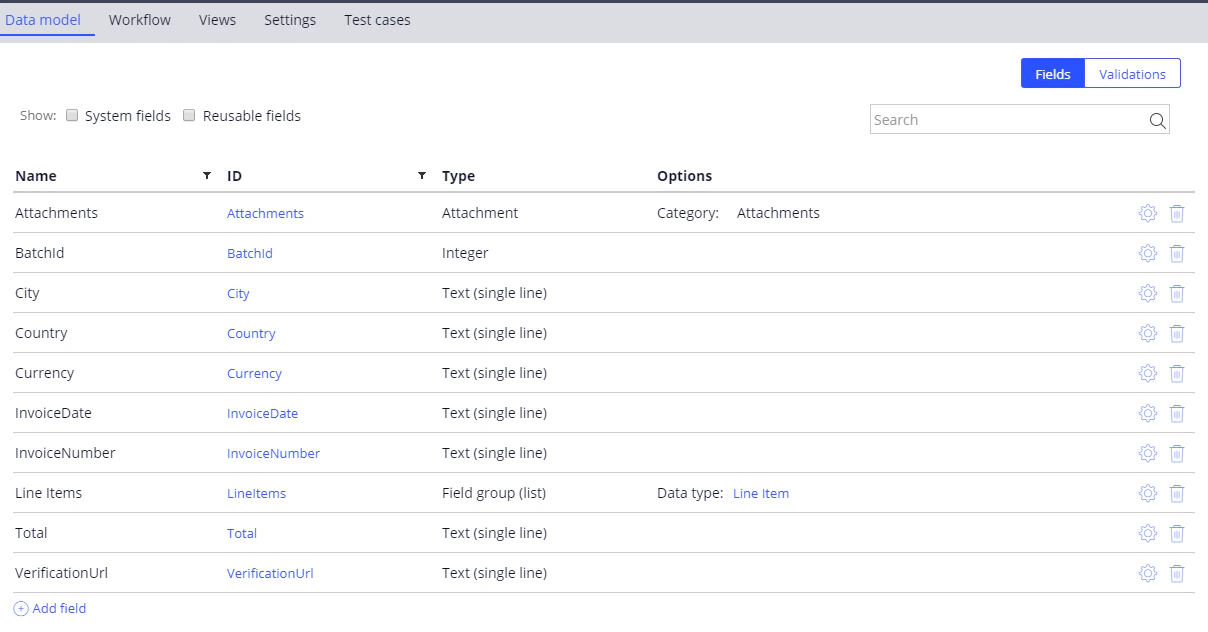
Data model fields
Add the following fields on the Data Model tab, in addition to the required Attachments, BatchId, and VerificationUrl fields:
For the Line Items data type, see Data types for a single-document processing case.
Configure the stage that submits a document for processing
For the general procedure, see Configure the workflow stages and The Utility step.1
Replace the step
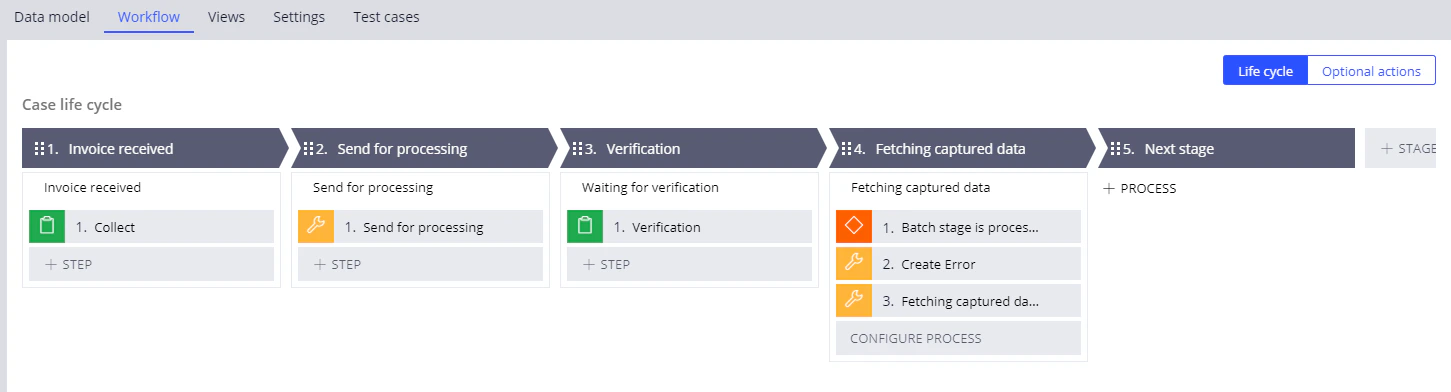
Open the Send for processing stage in configuration mode, replace the Edit details step with a Utility step, and name the step
Send for processing.2
Call the activity
Open the Utility step and call the
SendForProcessing activity.Start creating the activity by clicking the configuration button to the right of the Rule field. Alternatively, leave the pyUtilityStub value in the Rule field and come back to this step after you have created the activity set.For more information, see SendForProcessing.3
Set the case identifier
In the CaseId field, specify 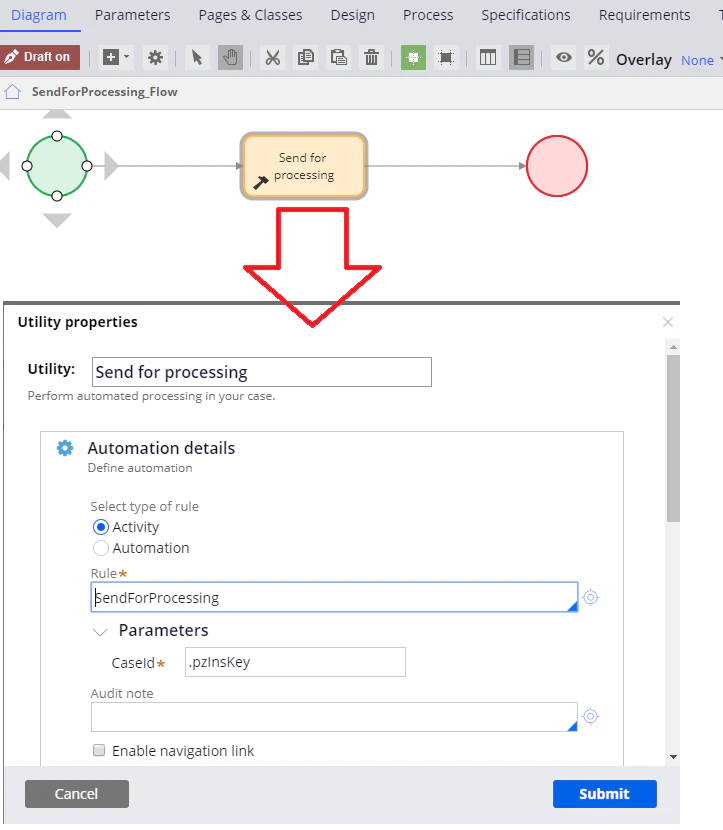
.pzInsKey.Configure the stage that fetches the processing results
For the general procedure, see Configure the workflow stages and The Utility step.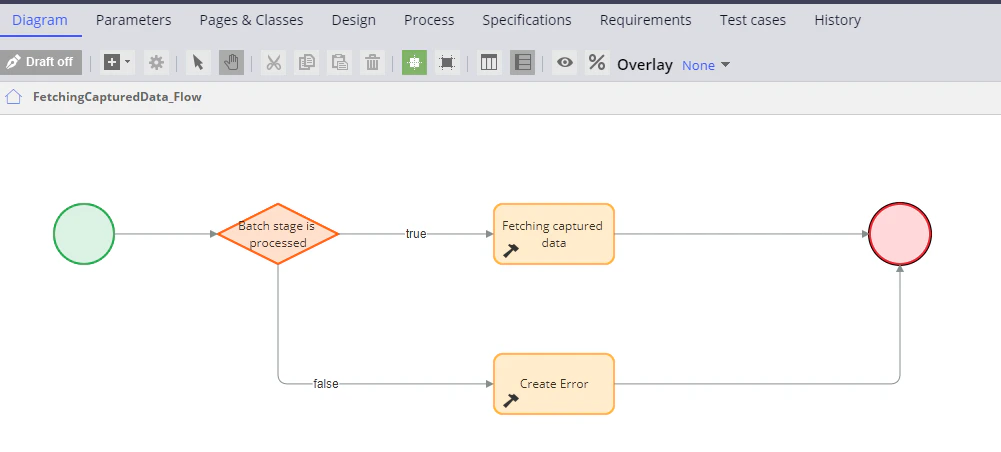
1
Delete the existing step
Open the Fetching captured data stage in configuration mode and delete the Edit details step.
2
Add a Decision step
Add a Decision step and name it
Batch stage is processed.3
Set the decision expression
Open the step and select Boolean Expression in the Type field. Specify or configure a 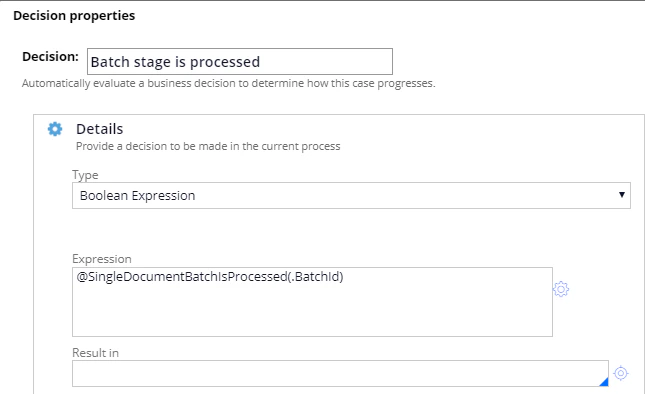
@SingleDocumentBatchIsProcessed(.BatchId) condition in the Expression field.For the function itself, see SingleDocumentBatchIsProcessed.4
Configure the true branch
For the 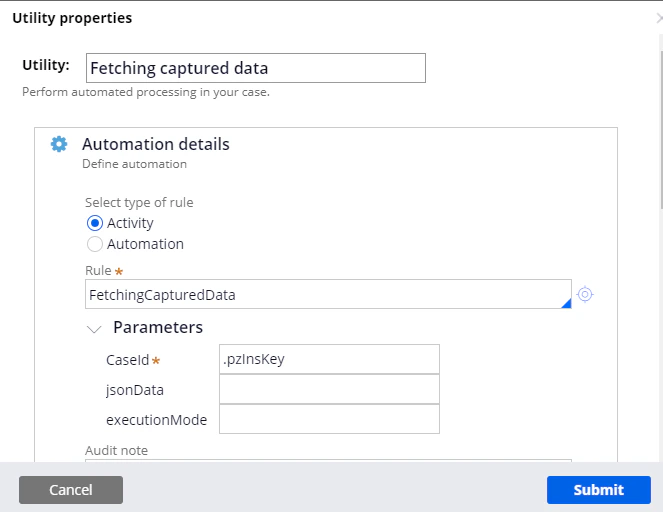
true branch, add a Utility step named Fetching captured data. Open it, call the FetchingCapturedData activity, and specify .pzInsKey in the CaseId field.For more information, see FetchingCapturedData.5
Configure the false branch
For the For more information, see CreateError.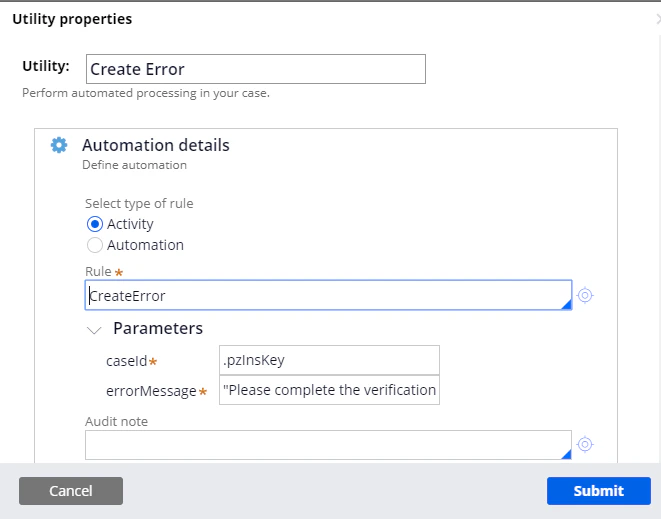
false branch, add a Utility step named Create Error. Open it, call the CreateError activity, and specify .pzInsKey in the caseId parameter field.In the errorMessage field, enter this text: