Configuring an M-Files workflow
To configure the processing of documents in FC with verification, complete steps 1 and 2 described in the “M-Files workflow activity: installation and use” section and then:- In the M-Files Admin application navigate to Connections to M-Files Server → Local Computer → Document Vaults → <Vault_Name> → Workflows and create a workflow by clicking New Workflow… button. Or modify your current workflow.
- Select the workflow that you just set up and create a state by clicking New State button.
- In the Name field, type a name for the state (e.g. “In Processing by FlexiCapture”).
- On the Actions tab of the State Properties window select the Run script option and click Edit Code….
- Paste the following script to the Edit VBScript Code window and provide your FlexiCapture connection settings, project name and batch type that you are going to use:
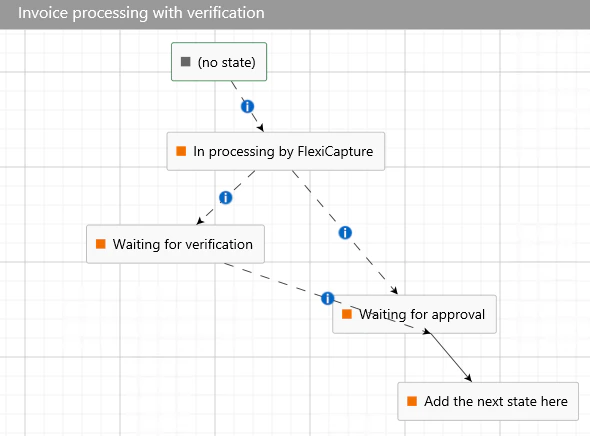
The above script, running in “In processing by FlexiCapture” state, sends documents to FC for further processing. The “In processing by FlexiCapture” state will cease, if the document stops at the verification stage in ABBYY FlexiCapture, or if the document skips the verification stage due to its high quality. If the document stops at the verification stage, a URL will be generated linking to the task created for this document on the Web Verification Station. This URL will be written to the document properties in M-Files.
- Close the Edit VBScript Code window and click OK button.
- To enable the “In processing by FlexiCapture” state to use a script to generate URLs for documents, you need to create a corresponding property. To do this, click Connections to M-Files Server → Local Computer → Document Vaults → <Vault_Name> and add a new property definition to the document class:
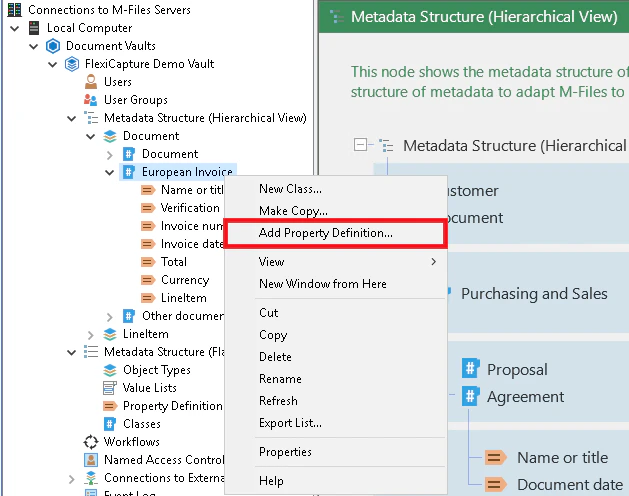
- In the Property Definition Properties - New Property Definition dialog box, type a name for the property (e.g. “Verification URL”) in the Name field and specify Data type: Text, Content: Text. In the script code, assign the ID of the property to the iVerificationUrlPropDef variable.
To find out the ID of the newly created property, select the Admin vault in M-Files and expand the Metadata Structure (Flat View) list. Next, select Property Definitions. The list of all property definitions will be displayed in the ID column on the right:

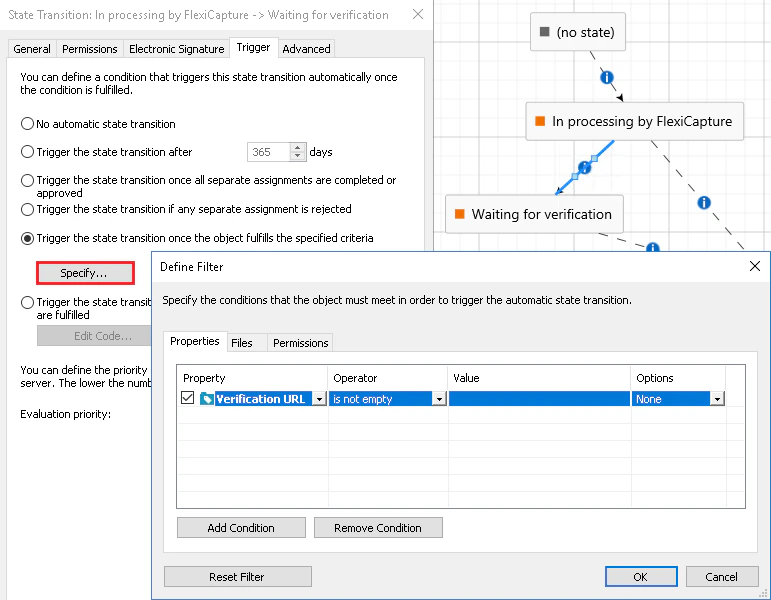
- Create a new state and give it a name (e.g. “Waiting for verification”) by repeating steps 1 through 3.
- The “Waiting for verification” state indicates that the document will stop at the verification stage in FC. You can set up the document to go into this state if there is a link to the verification stage in the Verification URL field in the document properties:
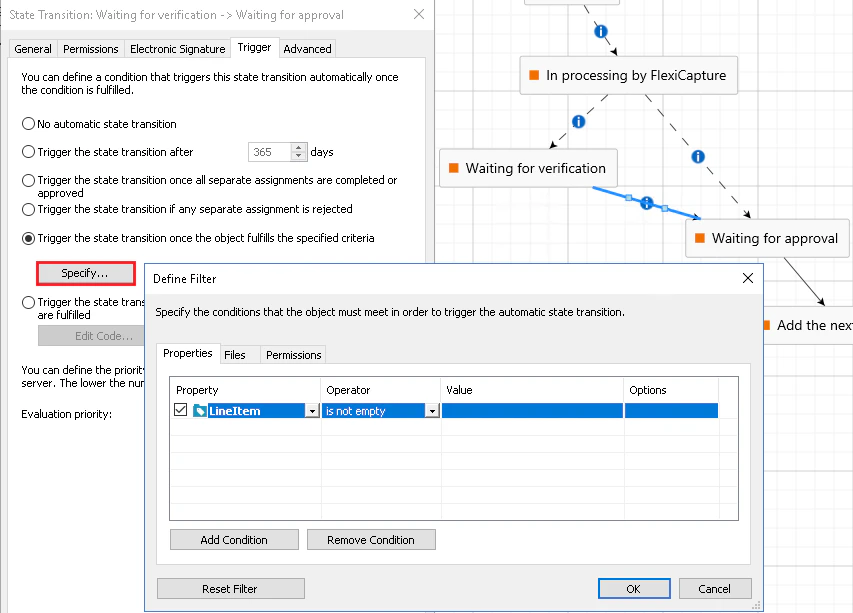
- Create a new state and give it a name (e.g. “Waiting for approval”) by repeating steps 1 through 3. You can set up the document to go into this state if certain required fields of the document are filled in:
Configuring your ABBYY FlexiCapture project
- To configure the workflow in FC, click Project → Project properties, select Schema: Advanced on the Workflow tab, and then select the Verification and click Edit….
- On the General tab, select the Enable web stations option and click OK.
- Create a new User type stage after the Verification stage by clicking Stage….
- On the General tab, type Mark No Verification in the Name field (be sure not to use any other name for this stage). Clear the linked to previous option.
- On the Entry Conditions tab, select the Under these conditions option and add a new rule by clicking Rule….
- In the Rule Settings dialog box, select Condition type: Script, open the script editor, select Script Language: C# .Net, and paste the following script code:
- Click OK.