- In Verification Flow Action, create a section named Verification and open it on the Design tab.
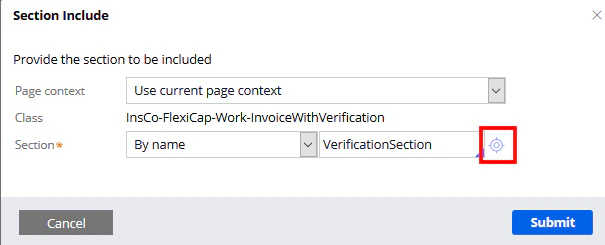
- Add two dynamic layouts. To the first dynamic layout, add an Embedded section named VerificationSection. To the second, add a button named Submit.
VerificationSection
When adding an Embedded section to a dynamic layout:- Select Use current page context in the Page context list. Select By name in the Section field and specify the following: VerificationSection.
-
Click the configuration button to create a new section.
- Click Create and open and then click the HTML tab.
- Clear the Auto-generated HTML option and enter the code provided below.
This code can also be copied from the VerificationSection.html file, which you can find in %Installation Path%\Connector for FlexiCapture as a Service with verification\Samples\Code examples\Flow actions.
Creating a custom Submit button
Before creating a button in the dynamic layout, you need to align it to the right of the screen. To do this, open the properties of the dynamic layout, click the Presentation tab, and select Right in the Float field. Click Submit to apply the changes.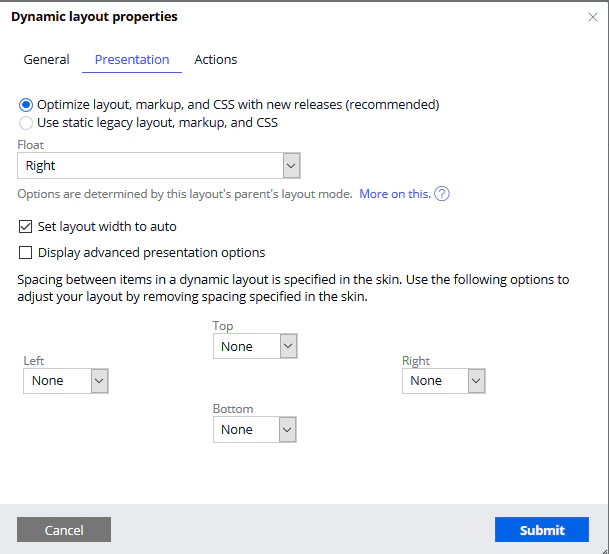
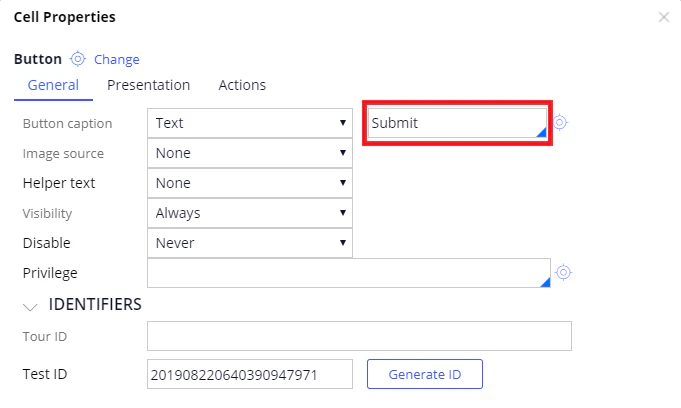
- Add a basic Button element to the dynamic layout and open its properties.
-
Click the General tab and specify Submit for the button caption text.
-
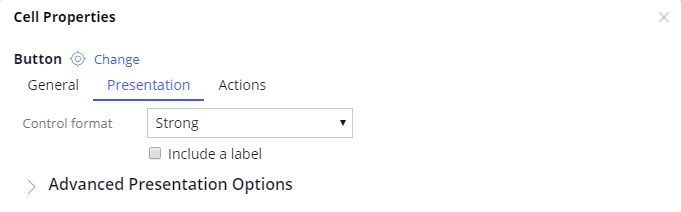
On the Presentation tab, select Strong in the Control format list.
-
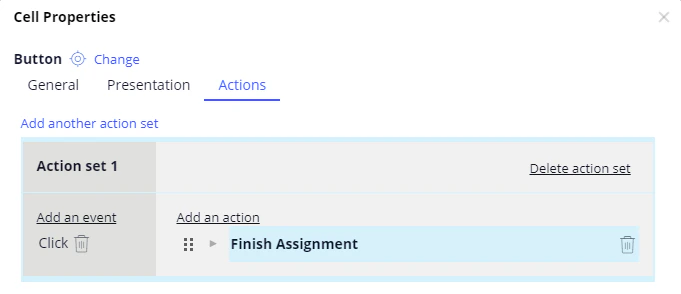
On the Action tab, add a Click event and connect it to the Finish Assignment action.
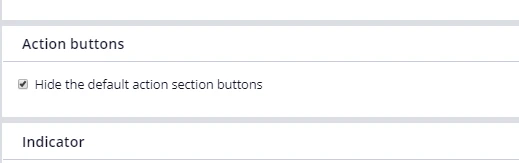
- Click Submit. To hide the standard set of buttons for the flow (i.e. Cancel, Save, and Submit), open Verification by clicking Records → Process → Flow Action, click the Action tab, and select Hide the default action section buttons.