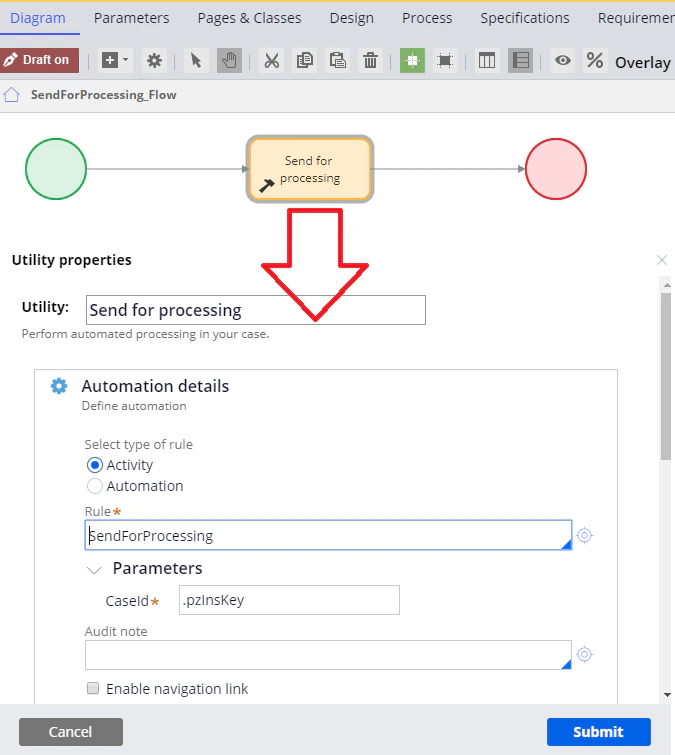
Configuring a stage that will submit a document for processing
For more detailed instructions, see the Configuring workflow stages and Utility step sections.- Open the Send for processing stage in configuration mode, replace the Edit details step with a Utility step, and specify the following name for this step: Send for processing.
- Open the Utility step and call the SendForProcessing activity. For more details about creating this activity, see SendForProcessing.
You can begin creating an activity by clicking the configuration button to the right of the Rule field. Alternatively, you can leave the pyUtilityStub value specified in the Rule field and come back to this step after you have created an activity set.
- In the CaseId field, specify the following: .pzInsKey.
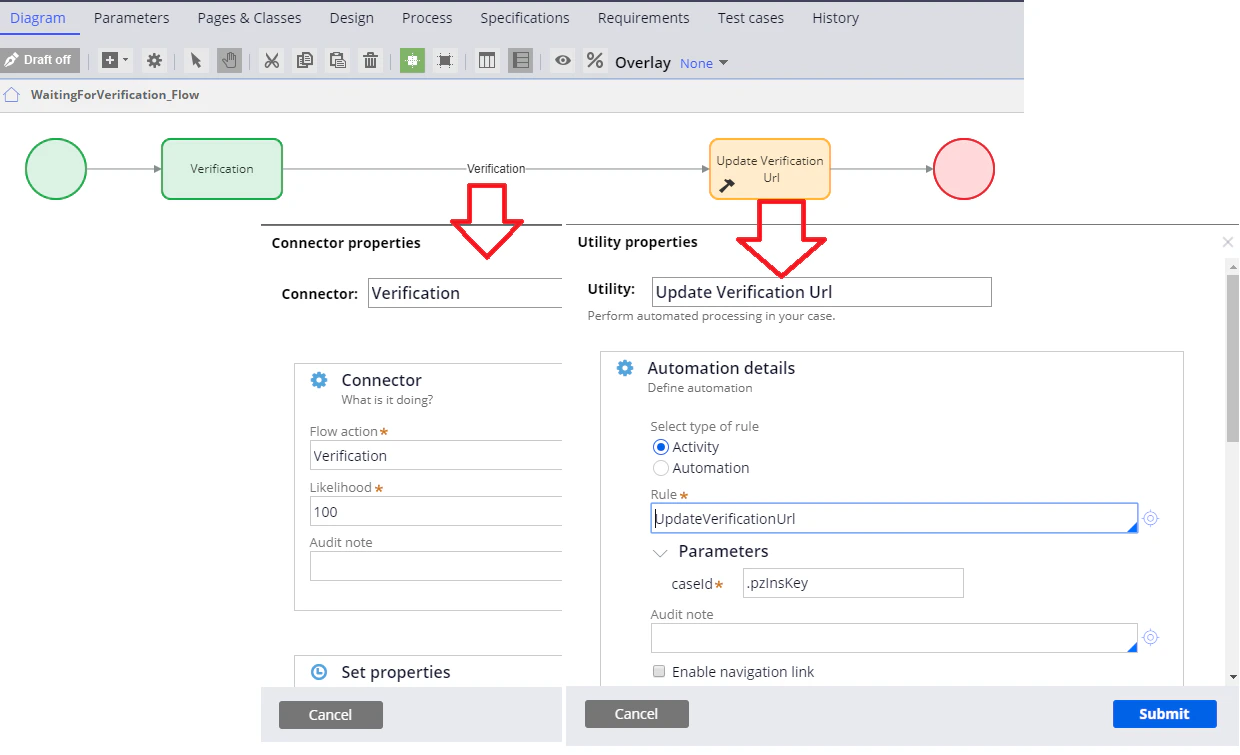
Configuring a verification stage
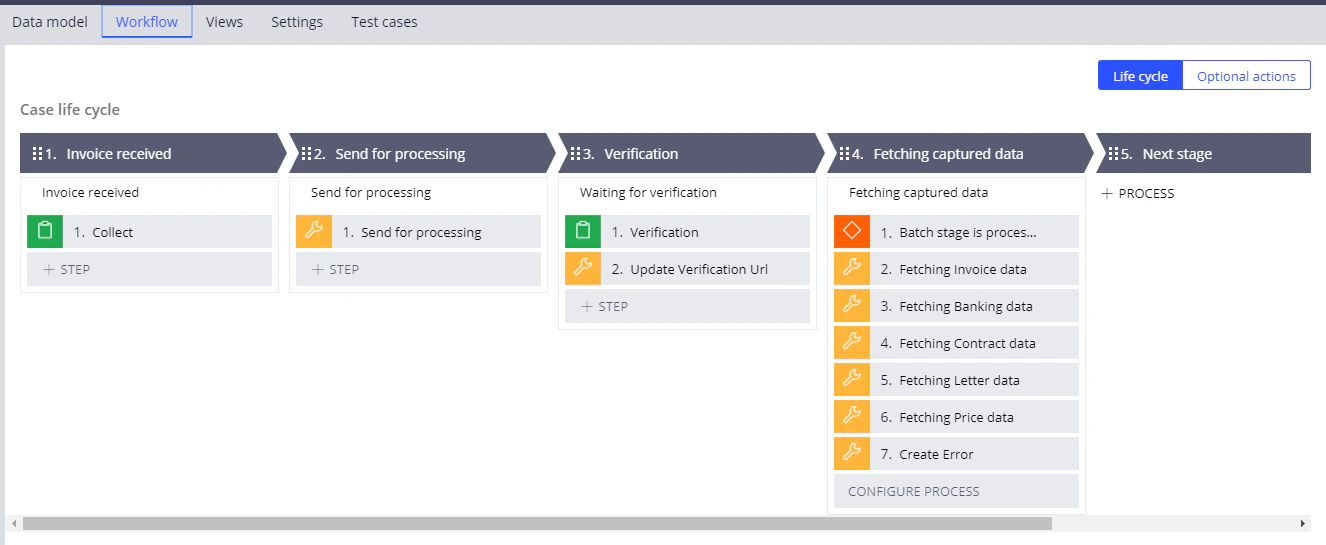
For more detailed instructions, see the Configuring workflow stages and Utility step sections.- Open the Verification stage in configuration mode, add a Utility step, and set its name to be Update Verification Url.
- Rename the Edit details step to Verification.
- Open the Update Verification Url step and call the UpdateVerificationUrl activity. For more details about creating an activity for a multi-document case, see UpdateVerificationUrl.
- Connect the Verification and Update Verification Url steps using a Verification flow action connector. For more information about creating a flow action, see Creating a flow action.
- In the CaseId field, specify the following: .pzInsKey.
Configuring a stage that will fetch the processing results
For more detailed instructions, see the Configuring workflow stages, Utility step, and Decision step sections.- Open the Fetching captured data stage in configuration mode and delete the Edit details step.
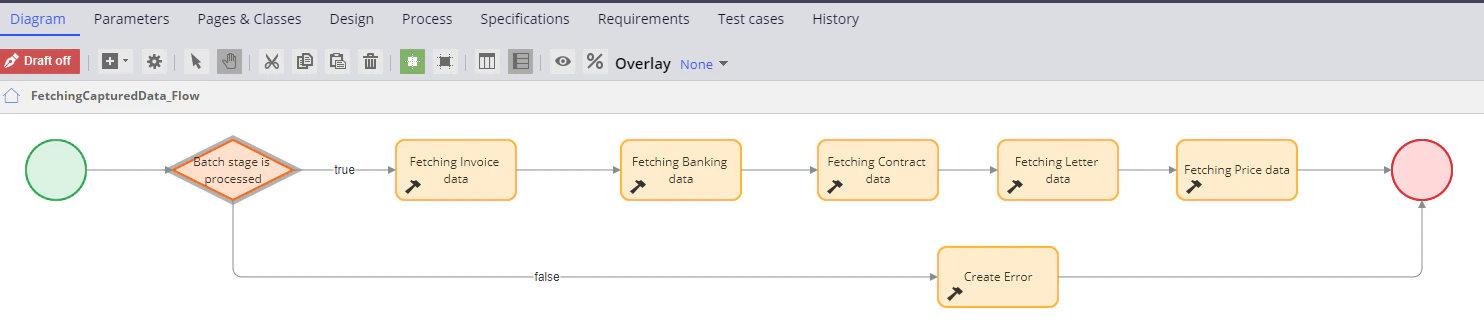
- Add a Decision step and name it Batch stage is processed.
- Open the step and select Boolean Expression in the Type field.
-
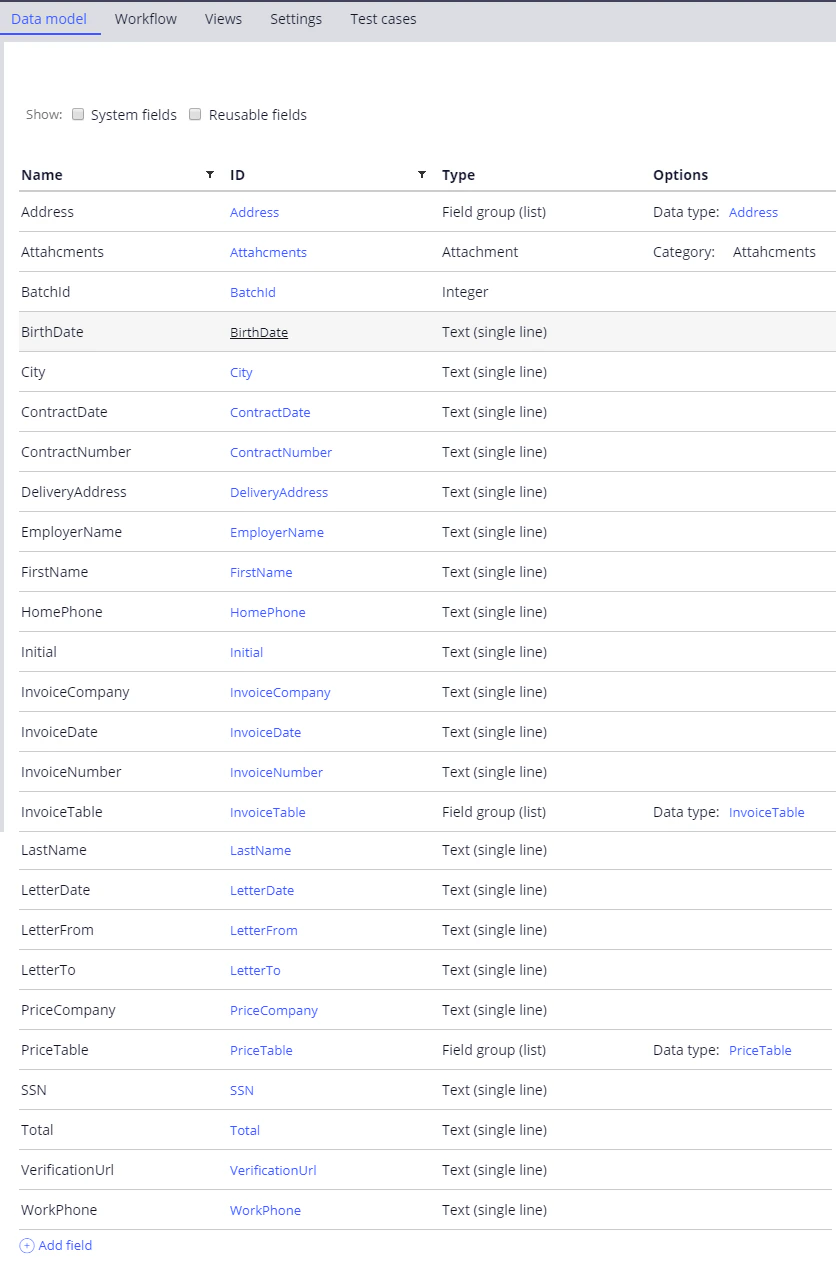
In the Expression field, enter or configure a @MultiDocumentBatchIsProcessed(.BatchId) condition. For more details about creating this function, see MultiDocumentBatchIsProcessed.
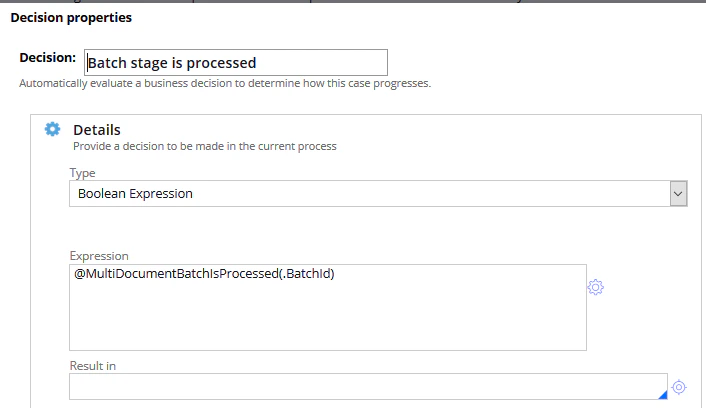
- Click Submit.
- Create a Utility step named Fetching Invoice data for the true branch and call the FetchingCapturedData activity. For more information about creating this activity, see FetchingCapturedData.
-
Enter .pzInsKey in the caseId field and Invoice_eng in the templateName field.

- For the true branch, create a Utility step named Fetching Banking data and call the FetchingCapturedData activity.
-
Enter .pzInsKey in the caseId field and Banking_eng in the templateName field.

- For the true branch, create a Utility step named Fetching Contract data and call the FetchingCapturedData activity.
-
Enter .pzInsKey in the caseId field and Contract_eng in the templateName field.

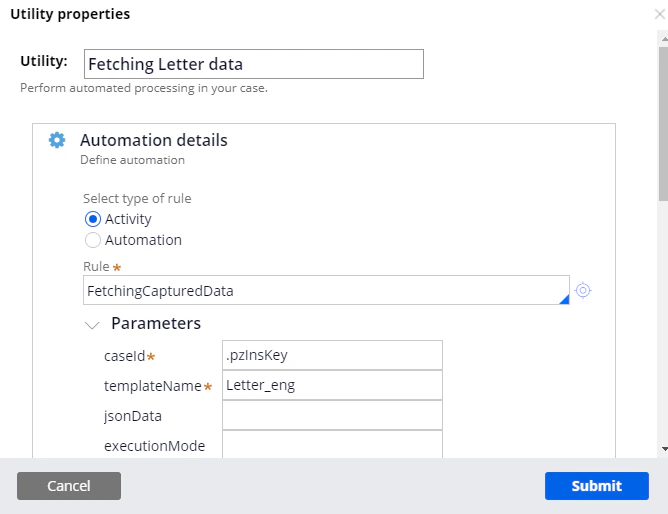
- For the true branch, create a Utility step named Fetching Letter data and call the FetchingCapturedData activity.
-
Enter .pzInsKey in the caseId field and Letter_eng in the templateName field.
- For the true branch, create a Utility step named Fetching Price data and call the FetchingCapturedData activity.
-
Enter .pzInsKey in the caseId field and Price_eng in the templateName field.

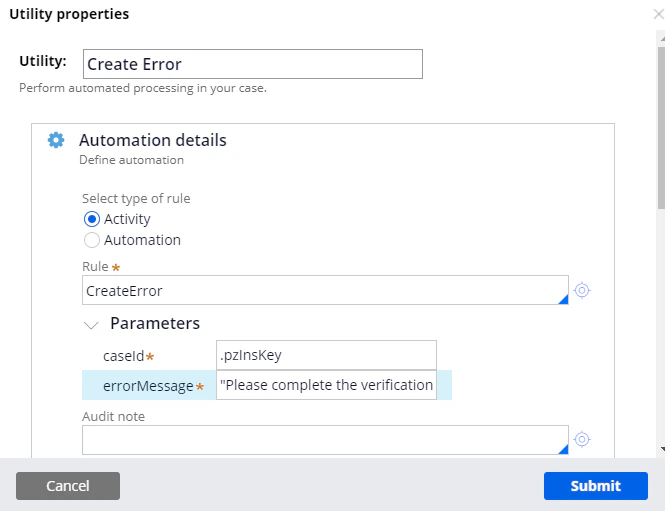
- For the false branch, create a Utility step named Create Error and call the CreateError activity. For more details about creating this activity, see CreateError.
- Enter .pzInsKey in the caseId field. In the errorMessage field, enter the following text: “Please complete the verification task before proceeding.”