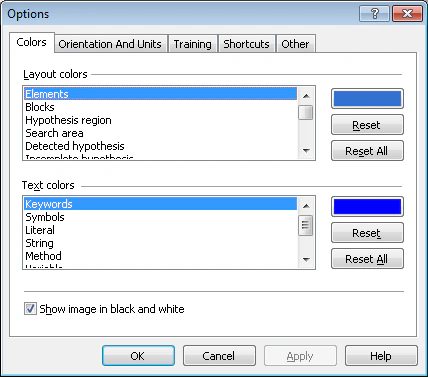
This dialog box allows you to select colors of objects and highlighting lexemes, possible page orientation, units of measurement to be used in the program, settings used when training a FlexiLayout and some other options. You can open the Options dialog box by selecting Tools → Options… or by pressing F12.

Option

Description

Colors tab

Layout colors group


Selects the colors of objects in the program (the colors of elements, hypotheses, search area, etc.). Select the desired object, click the color button, and select the desired color on the palette.

Reset and Reset All buttons

Clicking Reset selects the default color for the object.

Clicking Reset All selects the default colors for all objects.

Text colors group


Selects the color of lexemes in code (the colors of key words, variables, comments, etc.). Select the desired object, click the color button, and select the desired color on the palette.

Reset and Reset All buttons

Clicking Reset selects the default color for the object.

Clicking Reset All selects the default colors for all objects.

Show image in black and white

Select this option to display color images in black and white. Clear this option to display color images.

Orientation And Units tab

Orientation correction group

Correct orientations of pages

Selects the possible orientation of pages in the batch. Select Image → Correct Orientation to select page orientation automatically based on the selected pre-recognition language. If none of the options is selected, orientation will not be corrected automatically. The possible orientations of pages:

  • Rotated 180° - select this option if the batch may contain pages rotated by 180°
  • Rotated 90° clockwise - select this option if the batch may contain pages rotated by 90° clockwise
  • Rotated 90° counterclockwise - select this option if the batch may contain pages rotated by 90° counterclockwise

Units group


Selects the units of measurement to be used in the program: dots, centimeter, millimeter, points, inches. All the measurements (element sizes, distances) will be in the units selected in this dialog box.

Training tab

Navigation group


Selects the navigation mode to be used when training a FlexiLayout. You can navigate on pages containing:

  • any unmarked element
  • any unmarked field
  • any unmarked static element
  • unmarked selected element

Draft layout prediction group

Predict layout automatically on navigation

Selects this option to match the draft layout on navigation.

Replace existing regions of fields on batch prediction

Selects this option to remove existing boxes from the image when matching a draft layout.

Template generations group

Create Identifiers on Generation

Enables automatic creation of identifiers for layout alternatives during training.

Shortcuts tab

You can use this tab to specify keyboard shortcuts for specific commands. You can also change existing keyboard shortcuts.

Category (drop-down list)

Contains a list of all command categories. When you select a category, all commands in that category will be displayed. Select All commands to display all existing commands in the command list.

The name of a category usually matches the name of the menu item that contains the commands in that category. The Elements tree category contains commands from the FlexiLayout menu in the case of a flexible layout project or commands from the Classifier menu item in the case of a classifier project.

Command list

This is a list of all commands in the selected category. The Action column contains the names of commands and the HotKey column contains one of the keyboard shortcuts for commands. Every command can have several keyboard shortcuts.

To sort commands by names or keyboard shortcuts, click the name of either the Action or the HotKey column.

Current shortcuts box

When you select a command, all of its keyboard shortcuts will be displayed in the Current shortcuts box on the right.

Description area

This area contains a short description of the selected command.

Press new shortcut key box

This box is used for entering keyboard shortcuts for commands.

To specify a keyboard shortcut:

  • Click the Press new shortcut key box
  • Press the desired key or combination of keys on the keyboard
  • Click the Assign button to assign the key or keys you pressed to the command.
  • To delete a keyboard shortcut, press the Backspaсe key.

If you try to assign a keyboard shortcut which is already in use to another command, a message that contains the name of the command to which the keyboard shortcut is already assigned will be displayed. Click Yes to reassign the keyboard shortcut, or click No to cancel.

Note. A keyboard shortcut can be assigned to multiple commands provided that these commands are never available at the same time. For example, the Match, Classify, and the Generate Alternatives command from the training mode are assigned to Ctrl+E by default.

Note. Some keyboard shortcuts are reserved for specific commands and cannot be assigned to other commands. For example, Ctrl+A, Ctrl+C, Ctrl+V, Ctrl+X, Ctrl+Y, Ctrl+Z, Ctrl+Ins, Shift+Ins and Del.

Buttons

Reset all

Resets the keyboard shortcuts for all commands to their default values.

Delete shortcut

Deletes a keyboard shortcut.

Reset command

Resets the keyboard shortcut for the selected command to its default value. If the default shortcut matches a keyboard shortcut of another command, you will be prompted to change one of the shortcuts.

Assign

Assigns a keyboard shortcut to the selected command.

Other tab

Export group


To increment the version on export automatically, select the corresponding option.

Advanced code group


The maximum number of characters in each of the fields on the Advanced tab.

Search area group


To show the search area on the image, select the corresponding option.

Prerecognition area group


To show the search area on the image, select the corresponding option.

Appearance group


To use large toolbars in the program, select the corresponding option. You need to restart the program for the option to take effect.