Standard toolbar
The Standard toolbar contains buttons that correspond to standard commands such as creating, opening, and saving FlexiLayouts.
Extracted Objects toolbar
The Extracted Objects toolbar contains buttons that show or hide the objects detected during pre-recognition.
Block-Drawing Tools toolbar
The Block-Drawing Tools toolbar contains buttons that let you edit the reference layout.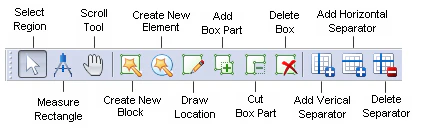
The Draw Location, Add Block Part, Cut Block Part, Delete Box, Add Vertical Separator, Add Horizontal Separator, and Delete Separator buttons are available only in Reference layout mode and Training Mode.
Layout toolbar
The Layout toolbar contains buttons that display the test images in different modes.
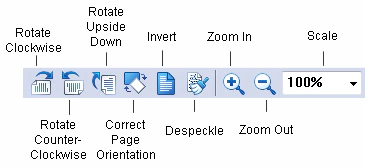
Image Tools toolbar
The Image Tools toolbar contains buttons that correspond to standard commands such as rotating and scaling the selected images.